
When I need a photo or video these days, I grab my iPhone, not my DSLR. Some of that is probably laziness, but it is more than just that. The iPhone produces a really good pictures — at times, significantly better pictures, than my more traditional camera. I wanted to take that excellent picture maker and make it more suitable for accessories without buying some sort of proprietary case and accessory system for my phone that is clunky to fool with. Here’s what I did.
Why bother adding to the already good camera of the iPhone with accessories? There are several reasons you might want to. Sometimes, something extra to grip onto to stabilize the camera is useful (especially useful for video). Anyone who has spent time with more professional camera equipment is also accustomed to adding light sources, microphones and such — but that isn’t nearly so easy with a phone, which lacks a hot or cold shoe (the place a flash — and occasionally a microphone — is attached to a camera) or tripod mount.
Here was my particular reason: a year or so ago, I wanted to use my iPhone for filming a video for my church outdoors. While the iPhone has a surprisingly good microphone, it can be just as surprisingly bad in windy conditions, picking up way more wind noise than your ears likely perceive.
I had a variety of spare parts from a past project or two and wondered if I could put them together in a suitable configuration to deal with filming in windy conditions. The real magic of my project is a simple “Dual Camera Mount” bracket from Neewer, which costs just ten bucks. While really intended for using two cameras at the same time, for me, it forms the foundation of my “iPhone camera rig.”
To actually attach the iPhone, I used my favorite iPhone tripod adapter, Reticam, that surrounds the phone securely with a solid metal mount. Sturdy enough to give you peace about entrusting your expensive and all-too-depended-upon phone to its grip, while also gentle on the phone thanks to nice rubber padding. This is useful for mounting an iPhone to any tripod, but in this case, it allows me to secure the phone to one side of that Neewer bracket for one Andrew Jackson countenanced bill.
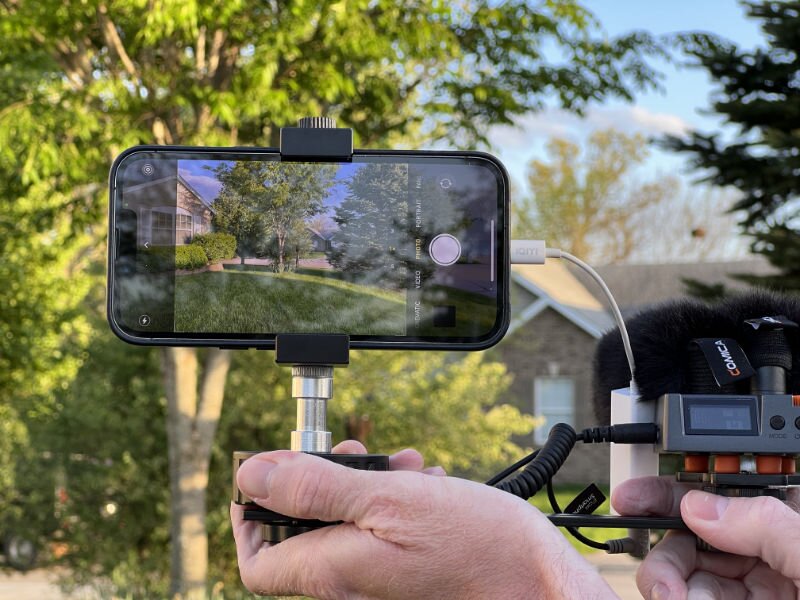
For a comfortable grip, I also added a tripod spacer and a small extra metal spacer (a 1/4” male to 1/4” male camera screw adapter with a 1/4” to 3/8” adapter inserted, both from this handy kit of adapters).
With those parts, I had a phone secured to a metal bracket with a second tripod mount opposite the camera (you can adjust for your preferred handedness by putting the phone on either side). The remaining mount is where the magic happens. Many accessories — microphones and lights, in particular — come with the aforementioned hot/cold shoe mount, but often also have a tripod mount hidden on the bottom of the very same mount. You can simply screw in these things to that tripod mount and you’re good to go; for accessories that only have a cold shoe mount, adapters are available for that.
The nice thing is that once you have a tripod mount, you can adapt to nearly anything else that might be intended to mount useful audio or video equipment.
Back to my anti-wind-noise project for the church. I had been testing a Comica Traxshot microphone for another purpose and, my contraption now assembled, it obviously had to come along for the ride on my bespoke camera grip.
The Traxshot is a tiny, rechargeable, flexible dual microphone system and both of the microphones on the little unit come with dead cats — audio technician lingo for a fuzzy wind protector that goes over a microphone. With the Traxshot mounted, I can point both microphones towards a subject, point one backward to do an interview with someone from while I stand behind the camera or angle them to get stereo recording of whatever is in front of the camera. All of this with significantly better wind resistance than the built-in microphone.
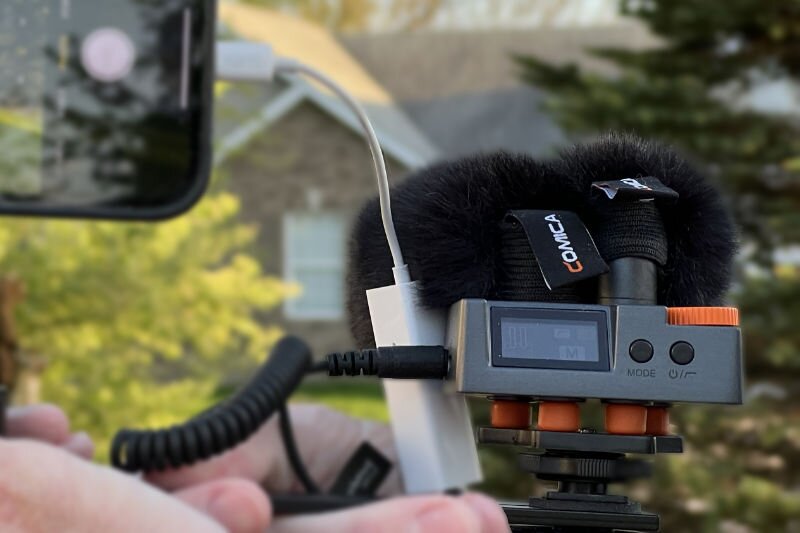
One final piece is, unfortunately necessary to make my ad hoc iPhone-as-video-camera-rig arrangement work: I used an inexpensive Lightning to Headphone adapter that takes the “TRRS” microphone connector most smartphone friendly microphones include and connects it to my iPhone via the Lightning port. If your mic only features a “TRS” jack, a TRS to TRRS adapter will also be needed.
(Yes, I do still miss the old headphone/microphone jack that Apple led the way on eliminating.)
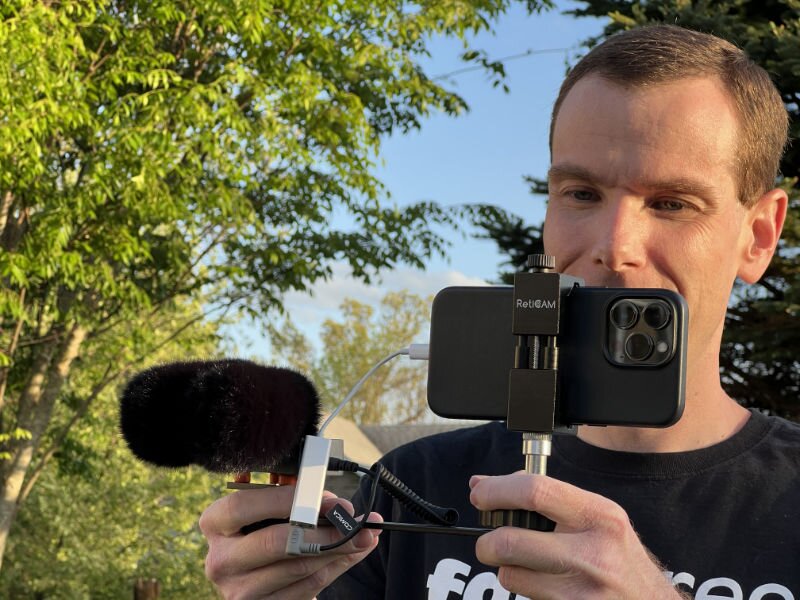
The final result of my “what can I do with spare parts I have lying around” project is a highly flexible smart phone camera rig that costs about $50, including the tripod mount and Lightning adapter, both of which can be used elsewhere as well. The Comica microphone adds a good deal of cost to the project, though the admirably good, affordable Movo VXR10 can offer many of the same benefits for just $40.
Whichever microphone you choose — or light, should that be more what you need — you can join me in feeling good at having built a little contraption that works just as well as more expensive options and with far more flexibility. 

Timothy R. Butler is Editor-in-Chief of Open for Business. He also serves as a pastor at Little Hills Church and FaithTree Christian Fellowship.
Pass along this article.
Never Miss Another Article from Timothy R. Butler.
You need to be logged in if you wish to comment on this article. Sign in or sign up here.


Start the Conversation